Fuse Networks Blog
Tip of the Week: How to Switch Microsoft Word to Dark Mode
Anyone who spends a lot of time sitting in front of a computer screen knows how much of a problem eye strain can be. With symptoms ranging from irritation to headaches and exhaustion, it is no wonder that many applications are trying to address this issue with varying success with “dark” or “night” modes. Let’s consider Microsoft Word’s approach to this and see if we can’t find a simpler way to adjust your settings and save your eyes no small amount of hassle.
Darkened screens have been more and more available as of late, particularly in mobile applications. Everything from Amazon Kindle to Twitter now offers a means to inverse the display, showing lighter text on a dark background.
This configuration makes it much easier to view a screen in the dark without causing eye strain—which, considering the amount of time many spend with a screen in their face, is quite a difference.
Let’s jump back to Microsoft Word, which many of us have a lot of experience with, thanks to long hours spent in documents on our PCs. Chances are, you’re familiar with the headache that comes after spending these hours. Let’s go through adjusting the settings to change Microsoft Word’s theme to the dark mode.
For our purposes today, we’ll focus on Microsoft Word’s PC version, rather than the mobile version.
Getting Halfway There with the Office Theme
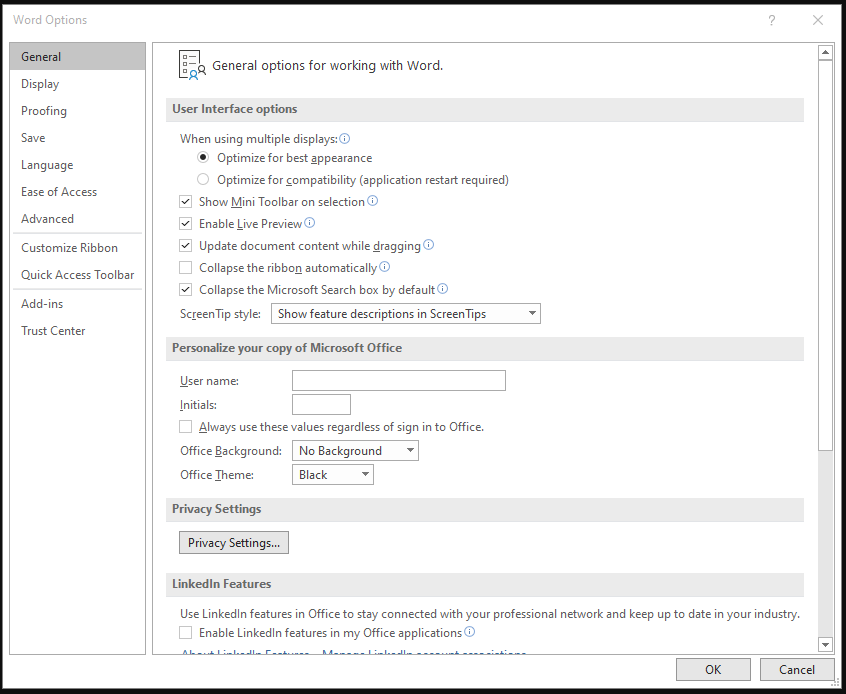
Once you have opened Word, click on File, and navigate to Options. Under the tab labelled General, find Personalize your copy of Microsoft Office. There, you’ll find the option to switch Office Theme to Black.
While in Word, click File and go to Options. On the General tab, under Personalize your copy of Microsoft Office, you can change the Office Theme to Black.

It is easy to understand why one would assume that this would make the background of the page appear dark and the text appear light, but this is unfortunately not the case.
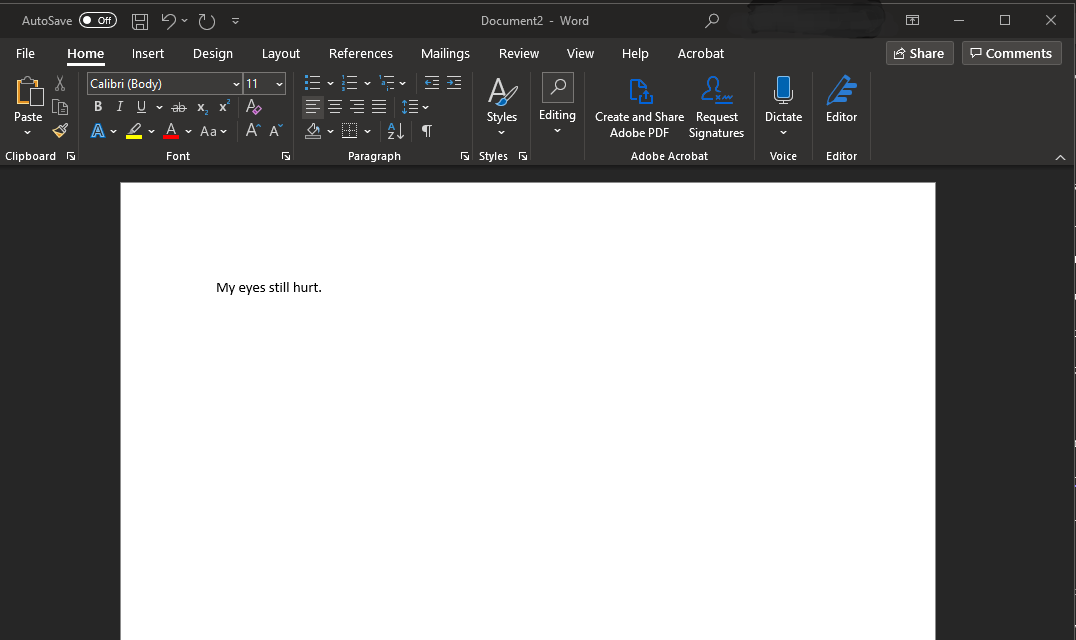
Instead, you’ll wind up with something like this:

As it turns out, changing the office theme effectively inverses the color scheme of the Microsoft Word software itself, not that of the document you are working on. While this may help make the tool ribbon easier to look at, the glaring white of the document is only more pronounced.
This makes sense when you think about it. After all, if the office theme were to change the background and font colors of the document itself, users could get confused about what the actual color of the document is.
Fortunately, there is a simple way that you can make your documents appear in a more complete version of a dark mode… WITHOUT printing out that way.
How to Really Use Microsoft Word’s Dark Mode
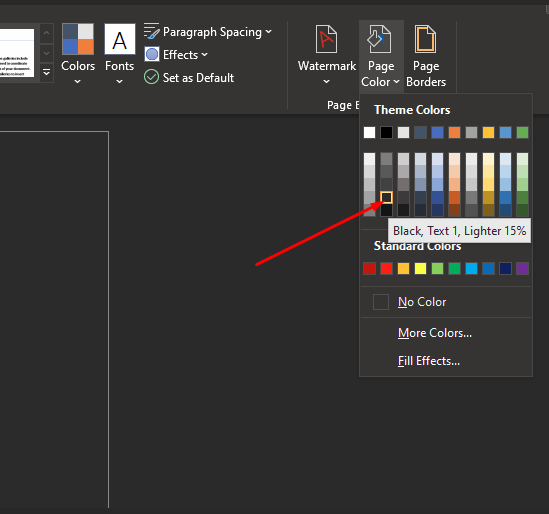
In the tool ribbon at the top of Microsoft Word, find the Design tab and locate Page Color. If you can’t find it, try clicking on the Magnifying Glass at the top-right of Word, and search for Page Color there.

Once there, you should select one of the darker colors. Your document will preview the colors as you hover over your options. Lower number values will generally make the text lighter. We recommend the second option up from the bottom in the second column, as seen in the above screenshot.
Switching it back is as simple as returning to your Page Color option and selecting the white box in the color grid.
This will only impact the document you are currently working on, without touching any other documents. Sharing your document will present the dark background to whoever it is who opens it.
Preview Before You Print
Let’s assume that you want to print your document, but not in this dark mode so that it doesn’t waste so much ink. While you shouldn’t have any problems after changing these settings, some older Microsoft Word versions might not cooperate so well.
You should just have to print the document as you always would. If you’d rather play it safe, you can go back to Page Color and revert your changes. Of course, you should always preview your document before printing it to be sure.
If the preview does show you white text on a black background, you either need to return to Page Color and switch the background to white, or simply instruct Word to ignore your background colors. This can be done by navigating to File and Options, finding the Display tab, and locating Printing Options. Once there, make sure that Print Background Colors and Images is unchecked before clicking Ok. That way, wasting ink is no longer a concern.
Hopefully, this tip has helped you. Subscribe to our blog for more!


Comments